Welcome to your go-to guide for building a strong and stylish retaining wall in Wellington! Whether you’re tackling a sloped backyard, looking to prevent erosion, or simply want to enhance your outdoor space, understanding the materials you need is a crucial first step. With Wellington’s unique climate and terrain, choosing the right supplies can make all the difference in durability and design. In this post, we’ll walk you through all the essential materials—along with helpful tips and local insights—to ensure your retaining wall not only looks great but stands the test of time.
To build a retaining wall in Wellington, you’ll need key materials such as concrete blocks or treated timber for the wall structure, crushed rock or gravel for the base, drainage materials like ag pipes and scoria, and backfill materials such as gravel and landscape fabric. These components ensure stability, proper drainage, and long-term durability in Wellington’s varied terrain and weather conditions.
Table of Contents
Why Build A Retaining Wall In Wellington?
When you live in Wellington, chances are you’ve encountered the kind of landscape that’s anything but flat. With rolling hills, steep slopes, and unpredictable weather, maintaining a functional and beautiful outdoor space can be challenging. That’s where retaining walls come in. These structures aren’t just for looks—they serve a critical purpose in helping homeowners manage the natural terrain while also improving the usability and aesthetics of their outdoor areas.
One of the most common reasons people build retaining walls in Wellington is erosion control. The region’s frequent rainfall and strong winds can cause soil to shift, slide, or wash away, especially on inclined properties. A properly built retaining wall helps stabilize the ground, preventing erosion and protecting both your landscaping and the foundation of nearby structures.
Another practical reason is sloped yard leveling. If you’ve got a steep section in your garden or backyard, it can be difficult to use or maintain. Retaining walls allow you to create flat, level areas that can be turned into patios, garden beds, or play spaces. This not only increases functionality but can significantly boost the value and livability of your property.
Of course, there’s also the decorative landscaping element. Retaining walls can define garden zones, frame pathways, or create layered planting beds that add visual interest to your outdoor space. Whether made from timber, stone, or concrete blocks, they can be designed to match your home’s style and enhance your curb appeal.
Wellington’s unique topography makes retaining walls more of a necessity than a luxury for many homeowners. The city’s terrain is famously hilly, and combined with frequent wet and windy weather, the ground is constantly shifting and settling. For instance, if you’ve ever driven around suburbs like Brooklyn, Kelburn, or Karori, you’ve likely noticed how many properties have clever retaining wall designs incorporated into their landscapes.
So whether you’re trying to reclaim usable space in your yard, safeguard your home from soil movement, or simply make your garden look more polished and organized, building a retaining wall in Wellington is a smart, often essential investment. Taking the time to plan it well—and using the right materials—can make a huge difference in its performance and lifespan.

Planning Before Picking Up A Shovel
Before diving headfirst into your retaining wall project, it’s essential to take a step back and plan things out properly. Many homeowners in Wellington get excited about transforming their outdoor spaces, but skipping the planning stage can lead to costly mistakes or even legal issues down the track.
Importance Of Permits And Local Regulations
If you’re building a retaining wall in Wellington, especially one over 1.5 meters in height or close to a boundary, you may need building consent from the Wellington City Council. Failing to get the right permits could result in fines or even having to dismantle the wall entirely. It’s always worth checking the current regulations on the council’s website or speaking with a local expert to ensure your project is compliant.
DIY Vs. Hiring A Professional
One of the biggest questions to ask yourself early on is whether you’re going to build the retaining wall yourself or bring in a professional. DIY is a great option for smaller walls, particularly if you’re using user-friendly materials like timber. However, if the wall will be holding back significant soil, needs engineered drainage, or is located on a steep slope, hiring a licensed contractor is often the safer—and more efficient—choice. Professionals can also help with permits, soil assessments, and long-term structural integrity.
Understanding Site Conditions: Soil, Height, And Drainage
Not all retaining walls are created equal, and that’s largely due to what’s beneath and around them. The type of soil on your property plays a massive role in how your wall should be built. Clay soils, for example, retain water and exert more pressure on the wall, while sandy soils may require deeper foundations. Wall height also affects design—taller walls need more robust materials and stronger reinforcements. Finally, don’t overlook drainage. Proper drainage systems, like ag pipes and gravel backfill, are critical to prevent water pressure from weakening your wall over time.
Taking the time to plan properly isn’t just about ticking boxes—it’s about building a wall that lasts, looks good, and keeps your property safe. So before you pick up that shovel, take a deep breath, do your homework, and set your project up for long-term success.

Essential Materials Needed For A Retaining Wall In Wellington
When building a retaining wall in Wellington, choosing the right materials is crucial—not just for strength and durability, but also for withstanding the local climate and soil conditions. From structural elements to drainage and finishing touches, each component plays a role in ensuring your retaining wall performs well and lasts for years. Below is a breakdown of the essential materials you’ll need, along with tips on how to choose the right ones based on your property’s slope, style preferences, and budget.
Wall Building Materials
This is the core of your retaining wall. The material you choose here will determine how the wall looks, how long it lasts, and how much maintenance it will require over time.
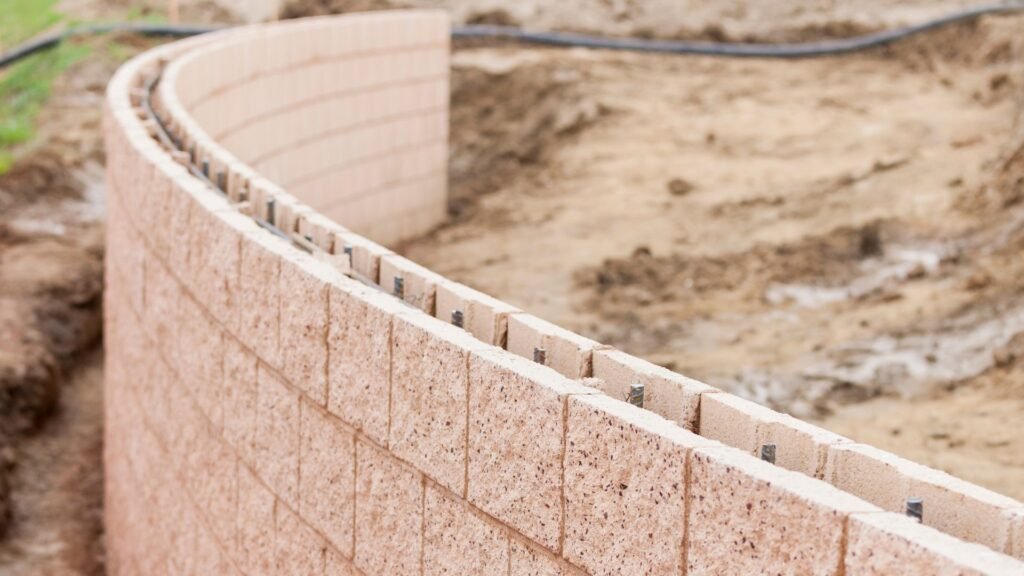
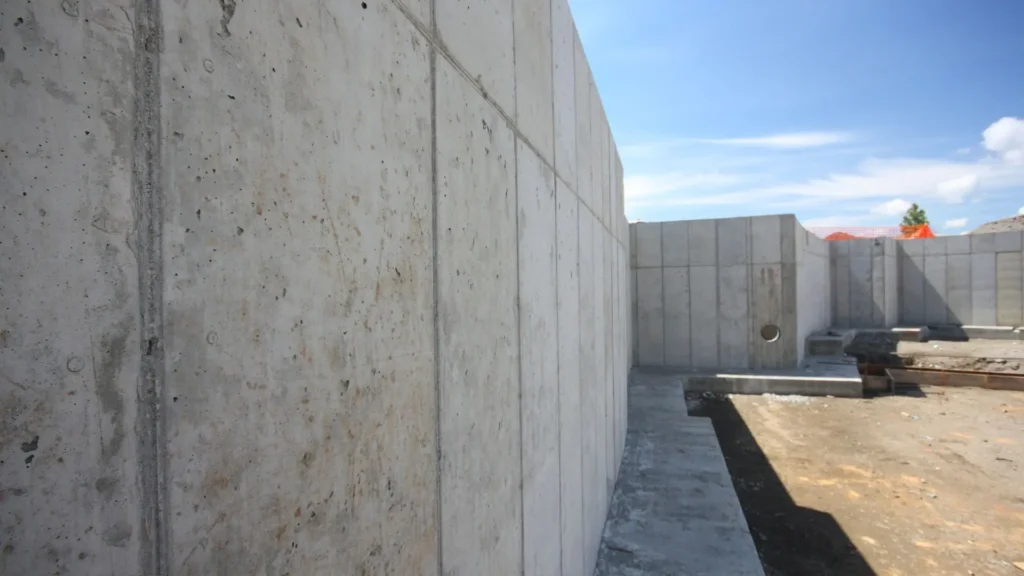
- Concrete Blocks: Known for their durability and weather resistance, concrete blocks are a popular choice for retaining walls in Wellington. They handle moisture well, don’t rot, and provide a clean, modern finish. On the downside, they can be heavy and require proper footing and reinforcement, especially for taller walls.
- Timber (Treated Pine or Hardwood): Timber is ideal if you’re going for a more natural or rustic aesthetic. It’s easier to work with for DIY projects and is generally more affordable. Treated pine is cost-effective, while hardwoods offer better longevity. However, timber can degrade over time if not properly sealed and maintained, especially in Wellington’s moist climate.
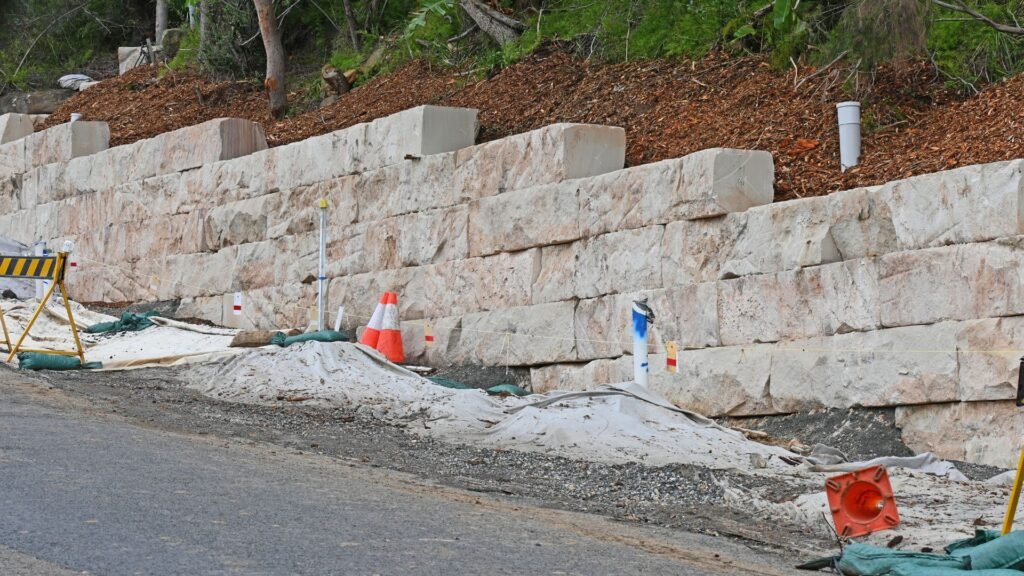
- Stone Or Boulders: These provide a natural, earthy look and are incredibly durable. They are perfect for homes with a rugged or traditional landscape design. On the flip side, sourcing and transporting stone can be costly and labor-intensive. They also require skilled stacking to ensure stability.
- Gabion Baskets: These are steel wire cages filled with rocks. They’re becoming increasingly popular due to their modern appearance and excellent drainage capabilities. Gabion walls are flexible, which makes them ideal for areas with unstable ground. However, they require careful installation and a bit more planning.
- Tips For Choosing Wall Materials: Consider your property’s slope—the steeper the area, the more structural integrity you’ll need. For tight budgets, timber is often a go-to. If you want a sleek, professional look, go with concrete blocks. For rustic charm and strong water flow handling, stone or gabion baskets may be best.
Foundation/Base Layer Materials
A retaining wall is only as strong as the foundation it stands on. The base layer supports the entire structure, distributes weight, and ensures long-term stability.
- Crushed Rock Or Gravel: This forms the primary base layer and is vital for both structural support and water drainage. It creates a solid footing that reduces shifting and movement over time. Use a layer that’s at least 100mm deep and compact it thoroughly.
- Compacting Sand: Often used above the crushed rock, compacting sand helps level the base and provides a smooth surface for laying blocks or timber. It also assists in minor adjustments during installation.
Backfill Materials
Backfill is the material placed behind the wall. It impacts how well the wall drains, how much pressure is exerted against it, and whether it stays in place over the years.
- Gravel Backfill: Gravel allows water to pass through easily, reducing hydrostatic pressure behind the wall. This prevents bulging or wall failure. Choose clean, coarse gravel for the best results.
- Geo-Fabric Or Landscape Fabric: This sits between the backfill and the soil to prevent the two from mixing. It keeps your drainage layer clean and effective while also helping to reduce weed growth behind the wall.
Drainage Materials
In Wellington’s often rainy climate, drainage is not optional—it’s essential. Without proper drainage, water builds up behind the wall, increasing pressure and risking collapse.
- Ag Pipes (Perforated Pipes): Installed along the base of the wall, these pipes collect and redirect excess water away from the wall structure. Make sure to slope the pipe slightly toward an outlet to ensure water flow.
- Drainage Scoria Or Coarse Gravel: Used around the ag pipe and behind the wall, this helps water flow freely to the pipe while preventing clogs. It adds another layer of defense against water buildup.
Fasteners & Extras
These finishing materials and connectors ensure everything stays in place and looks good once the wall is complete.
- Retaining Wall Pins Or Nails: For timber walls, you’ll need galvanized pins or nails to secure planks together. These must be rust-resistant to hold up against Wellington’s humid environment.
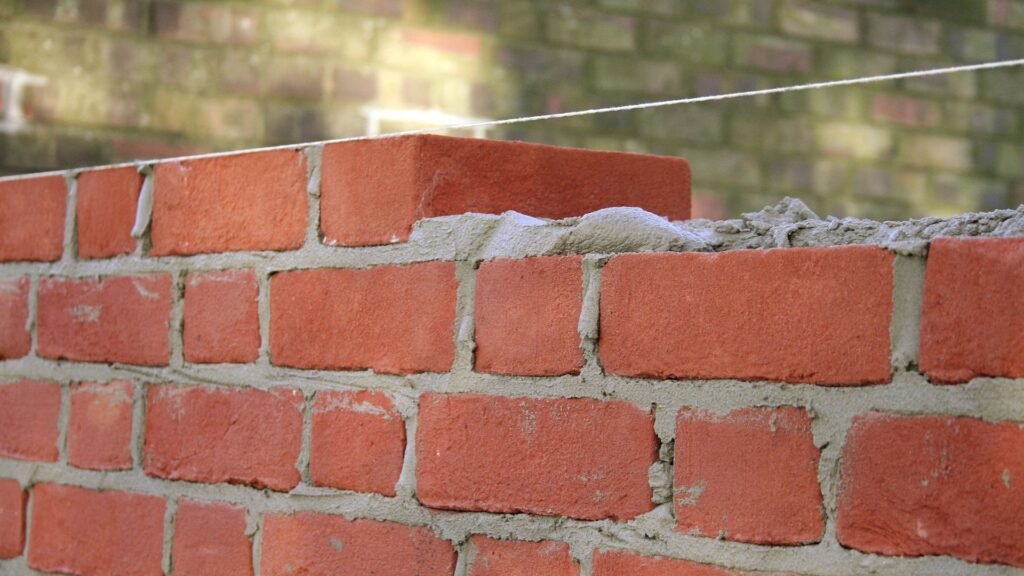
- Concrete/Mortar Mix: If you’re using concrete blocks or bricks, a good quality mix is necessary for binding and strength. It adds stability, especially in stacked or stepped walls.
- Wall Capping Units: These are installed on top of the wall to give it a polished finish and protect it from water ingress. Caps can be purely decorative or functional, and they often extend the life of your wall by reducing direct water exposure.
Choosing the right materials for your retaining wall in Wellington isn’t just about budget or looks—it’s about ensuring safety, performance, and longevity. From drainage to backfill and surface finishes, every layer has a purpose. Taking time to plan and select high-quality, weather-appropriate materials will pay off in a wall that stands strong through Wellington’s seasons and complements your outdoor space beautifully.

Climate-Proofing Your Retaining Wall In Wellington
When building a retaining wall in Wellington, one of the most important factors to consider is the region’s unique climate. With its coastal location, strong winds, and frequent rainfall, Wellington presents specific challenges that can affect the durability and long-term performance of outdoor structures. That’s why climate-proofing your retaining wall isn’t just a smart idea—it’s essential for protecting your investment and ensuring the wall holds up under pressure over time.
Importance Of Moisture-Resistant Materials In A Coastal/Windy/Rain-Prone Environment
Wellington’s climate can be tough on outdoor structures, especially retaining walls. Excessive rain and damp soil can lead to water build-up behind the wall, which puts pressure on the structure and increases the risk of movement or collapse. If materials aren’t chosen wisely, constant exposure to moisture can also lead to rot, corrosion, or structural weakening. Using moisture-resistant materials—like pressure-treated timber, concrete blocks, or stone—can greatly extend the life of your wall. For timber walls in particular, selecting wood that is treated for in-ground use (such as H4 or H5-rated) helps guard against decay and insect damage, even in consistently wet conditions.
Local Best Practices: Treating Timber, Using Proper Drainage
One of the most effective strategies for climate-proofing is proper material preparation. If you’re using timber, treating it with preservatives that resist fungal growth and moisture penetration is critical. Locally, builders often use timber that has been specifically rated for Wellington’s weather conditions. Beyond material choice, drainage is just as crucial. Installing perforated drainage pipes (also known as ag pipes) behind the wall allows water to escape instead of pooling. Backfilling with gravel or drainage scoria rather than dense soil ensures water flows easily through the wall’s foundation. Incorporating landscape fabric also helps keep fine soil particles out of the drainage system, which maintains long-term functionality.
Common Mistakes To Avoid
Several common errors can compromise a retaining wall’s performance in Wellington’s climate. One major mistake is neglecting to install weep holes or drainage pipes, which are necessary for releasing trapped water. Without them, hydrostatic pressure builds up behind the wall, often leading to cracks, bowing, or full structural failure. Another frequent issue is using the wrong base material—like compacted soil or fine sand—which fails to provide a stable, well-drained foundation. It’s also a mistake to skip compaction during base preparation, which can result in uneven settling over time. Lastly, failing to slope the backfill slightly away from the wall can cause water to collect at the base, accelerating deterioration.
By understanding Wellington’s environmental demands and applying these climate-proofing techniques, you can build a retaining wall that not only looks great but also performs reliably for years to come. Taking the time to use the right materials and follow local best practices can save you significant repairs—and headaches—down the line.

Tips For Buying Materials In Wellington
When it comes to building a reliable and long-lasting retaining wall, knowing where and how to buy your materials in Wellington can make all the difference. A smart approach not only saves you money but also ensures your project stays on track without frustrating delays or material mismatches. Here’s a closer look at how to get it right from the beginning.
Where To Buy: Trust Local Suppliers
Wellington offers a variety of reliable suppliers for retaining wall materials, from big-box hardware stores to smaller, specialty landscaping yards. For general building supplies, Mitre 10 and Bunnings Warehouse are well-stocked with timber, concrete blocks, drainage pipes, and gravel. These outlets are convenient and often have knowledgeable staff who can guide you toward the right product for your specific wall design and soil conditions.
However, if you’re looking for more tailored advice, premium-grade materials, or bulk landscaping options, local suppliers and stone yards are worth exploring. Many of these independent outlets specialize in retaining wall solutions and may even offer more flexibility in terms of pricing, delivery, or product variety. They may also be more familiar with Wellington’s terrain, climate, and council regulations, offering an advantage you might not get from larger chain stores.
Bulk Vs. Packaged Pricing: Know When To Buy Big
One of the most overlooked yet important aspects of buying materials is choosing between bulk and packaged pricing. If you’re building a small garden wall, packaged quantities may seem easier to manage—but they usually come at a higher cost per unit. On the other hand, bulk buying is often more economical if your wall covers a larger area or if you’re working on multiple landscaping projects.
Bulk options often include discounts on materials like gravel, concrete mix, and timber posts. Some suppliers even waive delivery fees for larger orders, which can result in significant savings. It’s worth taking the time to calculate your total volume needs upfront so you can take advantage of these bulk deals.
Tip: Ask For Material Calculators Or Free Estimations
To avoid overbuying—or worse, running out of supplies mid-project—take advantage of material calculators or free estimations offered by many local suppliers. These tools allow you to input your wall’s length, height, and type of materials to get a rough estimate of how much you’ll need.
Don’t hesitate to ask in-store or online; staff members are often happy to help you run the numbers. This small step can save you time, money, and multiple trips back to the store. It also gives you a clearer picture of your total budget, helping you avoid unexpected costs during the build.
Buying materials for a retaining wall in Wellington doesn’t have to be overwhelming. With the right supplier, some savvy shopping decisions, and a little planning using tools like estimators, you’ll be well on your way to building a strong, attractive wall that fits your landscape—and your budget. Always aim for quality over shortcuts, and when in doubt, talk to a local expert who understands the lay of the land.

Optional Tools You Might Need
When it comes to building a retaining wall in Wellington, having the right materials is only part of the equation—the tools you use can make a major difference in both the quality of your build and how smoothly the project goes. While some homeowners might already have a few basics in their shed, others may need to rent or buy a few additional items to get the job done properly. Below is a breakdown of optional but highly useful tools you might need during your retaining wall project.
- Shovel: You’ll need a sturdy, sharp-edged shovel for digging out your trench, moving soil, and leveling your base layer. A square-mouth shovel can be particularly useful for shaping clean, straight edges.
- Wheelbarrow: For transporting gravel, soil, backfill, and even tools across your worksite, a wheelbarrow will save you time and energy. Choose one with a steel tray and strong handles for better durability on uneven terrain.
- Level: Precision is key when laying your first row of blocks or timber. A spirit level (preferably a 1-meter or longer model) helps you maintain a straight, even wall and ensures structural integrity throughout the build.
- Compactor: Whether manual or powered, a plate compactor is crucial for packing down your gravel base and backfill material. This minimizes future shifting and ensures a solid foundation for your wall.
- Masonry Saw: If you’re working with concrete blocks or pavers, a masonry saw or brick saw will help you make clean, accurate cuts. This is particularly important for fitting blocks in tight corners or around curves.
- Other Helpful Tools: A string line for alignment, a tape measure for consistent spacing, and work gloves for safety are all great additions to your toolkit. If you’re building a timber wall, a power drill and retaining wall screws or spikes will also be needed.
- Tool Rental Options In Wellington: If you don’t own all of these tools, no worries—many Wellington hardware stores and tool hire companies offer affordable short-term rentals. Outlets like Hirepool, Kennards Hire, or even local Mitre 10 branches often have compactors, masonry saws, and other specialty tools available. Renting is a smart move for DIYers who want professional results without investing in expensive equipment.
In short, using the right tools doesn’t just make the job easier—it makes your retaining wall stronger, safer, and built to last in Wellington’s challenging outdoor conditions. Taking the time to plan your tools alongside your materials will give you a smoother construction experience and a better final result.

Ballpark Cost Breakdown
When planning a retaining wall in Wellington, understanding the potential costs involved can help you set realistic expectations and avoid budget surprises down the track. While prices will vary depending on the size of the wall, type of materials used, and whether you’re doing it yourself or hiring a professional, it’s always smart to start with a general idea of what to expect.
- Material costs: For basic timber retaining walls, expect to pay around $150 to $250 per square meter, depending on the quality of the wood and whether it’s treated for outdoor use. Concrete blocks typically range from $10 to $25 per block, while full systems that include interlocking blocks and caps may cost more. If you prefer natural stone or gabion baskets, those can cost significantly more, potentially $300 or more per square meter due to both material and installation complexity.
- Foundation and drainage materials: Crushed gravel or scoria for the base layer and backfill generally costs about $50 to $100 per cubic meter. Perforated ag pipes for drainage range between $40 to $80 depending on length and quality. Landscape fabric adds another $1 to $3 per square meter, a small cost that plays a big role in protecting your wall over time.
- Extras and finishing touches: Retaining wall pins, concrete mix, wall caps, and other accessories can add up to an additional $5 to $20 per linear meter. These extras, while often overlooked, are necessary to complete your project properly and should be included in your calculations.
- Labor costs (if hiring a professional): If you’re not building the wall yourself, professional installation can double or even triple the total cost. Labor in Wellington generally ranges between $60 and $100 per hour, or is calculated as a per-square-meter fee depending on the complexity of the job.
- Pro tip: Always plan for the unexpected. Whether it’s needing extra gravel, hitting unexpected soil conditions, or replacing a few blocks, costs can creep up quickly. It’s a good idea to budget an extra 10–15% on top of your estimated total to cover any unforeseen expenses. This buffer helps ensure your project stays on track without cutting corners or facing delays due to missing materials.
By understanding these cost components and building a detailed budget before you begin, you’ll be better prepared to tackle your retaining wall project confidently and efficiently.
At Retaining Walls Wellington, we help homeowners and DIYers across Wellington find the right materials, tools, and expert advice to build strong, stylish retaining walls that last. Whether you’re just getting started or need a full supply list, we’ve got you covered.

FAQs: Materials Needed For A Retaining Wall In Wellington
What are the basic materials needed for a retaining wall in Wellington?
The core materials include wall-building blocks (like concrete, timber, or stone), crushed rock or gravel for the base, landscape fabric, backfill material such as scoria or gravel, and drainage materials like perforated ag pipes.
Do I need drainage materials for my retaining wall?
Yes, drainage is essential to prevent water buildup behind the wall, which can cause pressure and lead to structural failure. Common drainage materials include scoria, ag pipes, and weep holes.
What’s the best material for a DIY retaining wall in Wellington?
Treated timber is a popular choice for DIYers because it’s easier to handle and install. However, for durability, concrete blocks or gabion baskets may be better suited depending on the slope and purpose.
Can I build a retaining wall without a permit in Wellington?
In many cases, small retaining walls under a certain height (typically under 1.5 meters) may not require a permit. However, it’s best to check with the Wellington City Council or a local expert to be sure.
How much gravel do I need for the base of a retaining wall?
The amount depends on the size and length of your wall, but as a general rule, you’ll need at least 100–150mm depth of compacted gravel for the base layer. It’s smart to budget for about 10–15% extra to account for settling.
What type of timber is best for retaining walls in Wellington?
Use H4 or H5 treated pine or hardwoods like macrocarpa that are rated for ground contact. They resist decay and are more suitable for Wellington’s damp climate.
How do I prevent my retaining wall from collapsing?
Use proper drainage, a solid gravel base, and appropriate backfill. Ensure your wall is correctly reinforced or anchored, especially for higher structures.
Where can I buy retaining wall materials in Wellington?
You can find supplies at local hardware stores like Mitre 10, Bunnings, and specialist landscape yards. Some suppliers offer bulk discounts or delivery services.
How much does it cost to build a retaining wall in Wellington?
Costs vary based on materials and size. DIY timber walls may start around $150 per square meter, while engineered walls using blocks or stone can range higher. Labor costs apply if hiring a professional.
What’s the best backfill material for retaining walls?
Clean gravel or scoria is best as it promotes drainage and reduces pressure on the wall. Avoid using clay or dense soil that retains water.
Conclusion
Building a retaining wall in Wellington involves more than just stacking materials—it’s about making informed decisions that ensure safety, durability, and long-term success. From selecting the right wall materials like treated timber or concrete blocks to incorporating crucial elements such as gravel for drainage, geotextile fabric, and a solid foundation base, every choice matters. Understanding the local climate and terrain, particularly Wellington’s hilly landscapes and wet conditions, adds another layer of importance to choosing quality materials and planning with precision. Whether you’re a DIY enthusiast or considering hiring a professional, taking time to plan thoroughly, invest in high-grade supplies, and follow best practices for drainage and structure will make all the difference. Thinking of building your own retaining wall in Wellington? Reach out for a free checklist or consult a local expert to get started!
About the Author:
Mike Veail is a recognized digital marketing expert with over 6 years of experience in helping tradespeople and small businesses thrive online. A former quantity surveyor, Mike combines deep industry knowledge with hands-on expertise in SEO and Google Ads. His marketing strategies are tailored to the specific needs of the trades sector, helping businesses increase visibility and generate more leads through proven, ethical methods.
Mike has successfully partnered with numerous companies, establishing a track record of delivering measurable results. His work has been featured across various platforms that showcase his expertise in lead generation and online marketing for the trades sector.
Learn more about Mike's experience and services at https://theleadguy.online or follow him on social media: